For my final project I used a couple techniques that I feel I really mastered. I used the cut out technique that my professor taught us. I feel that I really got a good hold on how to do this technique, I spent alot of time working on the cut out of Paul Rand on my final poster. Written below is the outline that you must follow in order to accomplish a presentable cut out.
Cut Out
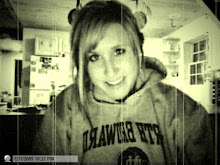
When you are picking out your image, make sure you check the size, you don't want it to be grainy.
Step 1: Make sure you copy the layer.
Step 2: Be on the layer that you are cutting the image out of and retrive your pen tool. Hit caps lock to get the cross hairs (these are easier to work with.)
Step 3: Follow with the pen tool in small advances as you move around your person. Click and srag to get curved edges. When you get to the hair, go wide and leave yourself room to use the eraser tool and make the hair look more realistic. Click to get a corner to a 90 degree point.
Step 4: When finished with cut out hold the shift key to get a perfect paralell line.
Step 5: Go to paths over above your layers and hit the small arrow button on the top that points to the right. Go to make selection then to feather radius. This controlls the softness or hardness of your edges. For example, If you have a feather radius of zero you will have a very hard edge as opposed to if it were five, it would be very soft. I always set it at three, safely in the middle.
Step 6: Take the eraser tool and use a dragging motion around the hair. Drag from the hair out in small motions. Make sure you have the opacity low so that your erasing doesnt look chunky.
Step 7: When your finished cutting the person out and have perfected the hair to your best abilities, go back to layers and make sure you are on the background layer.
Step 8: Hit Apple Shift I and you should get the marching ants around your cut out.
Step 9: Hit the delete key.
Step 10: Hit Apple D to deselect the image.
Step 11: Add a layer and fill it with the background color that you wish to use.
Step 12: Add another layer and go to the Layer Style tab and insert a drop shadow.
Step 13: To finish the total package, go to filter, and blur the shadow edge.
Helpful Hints: When zooming in and out use apple + and apple -. When you want to undo somthing hit Apple Z. When you want to increace or decreace the opacity of your eraser tool just hit the numbers at the top of the keyboard. When you want to increace the size of your eraser tool, hit the left & right brackets. When you want to zoom out to normal size, Hit Apple Zero.
I also believe that I mastered the technique of achieving graphic Unity and Visual Hierarchy.
Unity
To achieve Unity you must make all the elements in a design so interrelated that they look as if they belong together, or form a whole. I used the similarity of the circle shapes in my design to achieve this. You must make a design with some similar shapes and make it into something more than just circles. In my project I used the shape tool and I created a design by using different sized and colored circles, when placed together make something more than just a plain shape.
Visual Hierarchy
I believe that I achieved visual hierarchy in my design. They key thing that you have to rememebr is that you must have emphasis on the arrangement of visual emelemts according to importance, stressing some elements over the others, making a visible dominant element surrounded by other non dominate elements in a functional matter. I believe that my placement of Paul Rand gave my project a good ammount on visual hierarchy and I achieved this by his placement and they way that he is pointing us onto the information provided.
Wednesday, May 4, 2011
Wednesday, March 9, 2011


Monday, February 14, 2011

Tuesday, May 11, 2010

Thursday, May 6, 2010

Subscribe to:
Posts (Atom)